I usually get a lot of questions on stamping and tut requests. Stamping Nail art is easy all you need to do is practice a bit and get a hang of it. So I decided to make this post on how do stamping for nail art and a few essentials tips including must-dos and more importantly must-not-do. Also my heart burns when someone wants to stamp but cant. (LOL!) It really does..no kidding. :D
_______________________________________________
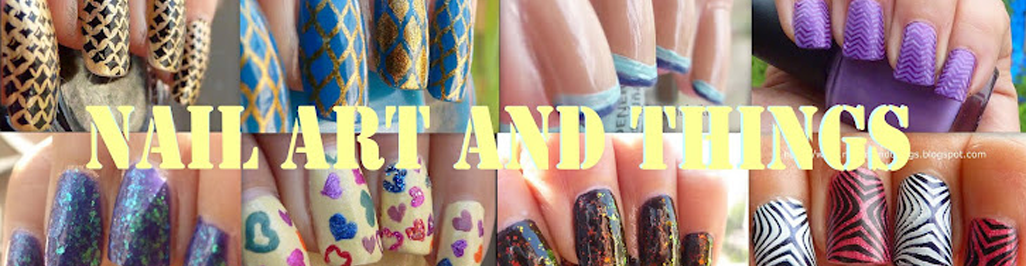
This is a really long and picture heavy post. But if you really wanna learn stamping, just take out 5 mins and go through it peacefully.
Those who know stamping, please feel free to point something I may have missed.
_______________________________________________
This is a really long and picture heavy post. But if you really wanna learn stamping, just take out 5 mins and go through it peacefully.
Those who know stamping, please feel free to point something I may have missed.
_______________________________________________
Requirement: Base polish, a Stamping image plate, stamping polish, polish remover/acetone, stamping pad, cotton pads, scraper(plastic card), a flat surface, newspaper or disposable surface.

Step wise:
1) Paint a base polish on your nails. You nails must be completely dry. If they are not dry stamping on it may spoil your base. I would recommend applying a top coat on your base polish. The top coat will be very helpful when you accidentally make a mistake when stamping. Simply get a cotton ball with nail polish remover and gently remove the stamped design. This will not ruin your nail polish.
Step 2.
Step 2.

2) Clean the surface of image plate, stamping pad and scraper with cotton dipped in acetone and wipe it dry. (This has to be repeated after every nail, If you are using a plastic card you may need to clean after a few swipes but the plate and stamper have to be cleaned after each nail).

3) Apply special polish on your stamping plate.
My note: For practice I used acrylic paints on paper. Now special polish/stamping polish is special because it is completely opaque in a single swipe. Konad makes special polish but they are expensive. Small bottle (5ml) costs around Rs.160-170, while bigger bottle (11ml) costs 240-260. As a beginner if you don’t think you want to spend so much since you are not sure if you can stamp or no, Fret not. There are other options. Some tried and tested options are: Colorama black, Lakme Metallics, Darker shades of Elle 18 pops, Lakme and some of your older slightly goopy dark shade polishes might work. Try darker shades over light polish. Most of the polishes available in India are slightly runny and so not opaque in one coat. (I am making another post to swatch all polishes I have including local Indian brands that work as stamping polishes...will update here later).
See below pic on how I apply polish for full nail designs.

For full nail designs: Load ur brush with polish, so that you cover the whole design without going back to the bottle

4) Now scrape the plate with a scraper. My note: I find it easier to use a plastic card (old/expired credit card, student id card ). Metal scrapers that come in the Konad kit work just fine, but they cause scraping marks on the plates which I think will spoil the plates in the long run. One swipe at 45° angle (see pic above) with the card/scraper should scrape of all excess polish. Support the image plate with your other hand. The only polish left must be exactly in the design.

5) Take the stamper and lightly roll over the image. My note: Most people face an issue here. They don’t pick up the image on the stamp or pick it partially. A few tricks to help:
- Always make sure you have cleaned and dried the surface of plate and stamper before hand.
- If you are sitting under a fan, try working without the fan. I find the fan and climate in India tends to dry the polish on image plate faster.
- Be quick..yes real quick. Like you can’t do anything else when stamping nails. Also remember to keep your stamper in front of you..you can’t go searching for it after you apply the polish on the image plate.
- Roll ok...The keyword here is “RrrrOLL” the stamp. Touch one end of the rubber pad at the edge of the design and roll over till the other edge has touched and lift. Make sure you roll over the whole design..not just the upper edge or middle. See pic (above) to better understand how to Rrrroll. After you master the art of picking up the image, you could “stamp” on the image in actual sense of stamp and pick up..but until then Rrrrolll and lightly and quickly. Dont press the stamper hard on the image plate..it tends to not pick up polish if you press really hard.
- If an image doesn’t transfer: try to alter the way of scraping. You might be scraping too hard or too lightly. Sometimes an image maybe be etched too deep or too lightly, scrape lightly with quick fluid movements. Also try to alter the way you stamp to pick up the image. Roll with a light hand/ roll with slight pressure/ stamp with slight pressure. I suggest you try a few combinations of pressure and rolling/stamping till you figure out what suits you best. Sometimes newer stamps have a slight protective coating on it..Use a nail filer or buffer on the stamping pad and file it a bit. You see’ll a few bits coming off it. Please don’t file it down..ok? just say 5-7 swipes in one direction, will make the surface rough enough for polish to cling to it.

- Practice. Yes practice makes a woman perfect!! I had given up on stamping before I picked it up with vengeance after I saw all the lovely blogs on internet with stamped nail art. Yes!!! For 6 months I kept myself happy with doing freehand dots and stripes on my nails. Then, I first tried to stamp using acrylic tube colours as Konad was not easily available in India then. I practiced picking up stamped images on stamper using acrylic tube paints. They don’t dry so fast, are thick and to some extent opaque. But remember they won’t work on your nails coz the stamper causes the image to squish and the paint being thick and wet will squish. Plus I am not sure if these are safe enough to be used on hands as we eat food with them. I practiced then on paper....you’ll understand the flow of things better once you’ve managed to stamp on paper a few times. Now try the same with thicker/older polishes on paper. After you get the hang of picking up an image on stamper, practice picking up smaller designs with thick image cut outs and then move on to bigger, full nail designs and delicate full nail designs.

6) Now Stamp on your nails. My Note: Again rrrroll the stamp over from one side to other side gently. If you manage to pick up the image on stamper but are not able to transfer on your nails, it probably means the polish is drying on the stamper. So BE QUICK or Quicker. Once you get the hang of stamping on your nails, you’ll be able to align the image better with your nails..so don’t worry if your stamped images are in different directions initially.
7) Now Start all over from point 2 :p
___________________________________________________
Must-Not-Do:
- Dont go searching. Gather all materials before you start stamping. My stamper keeps rolling away and after I scrape polish and I have to dart about things in a flurry to search it. Keep all things where you can see them.
- Try using acetone or polish remover that does not contain essential oils or nail conditioner. Acetone helps remove the left over polish effectively without leaving any residue.
- Do not press stamper too hard on your nail because chances are, the design will smudge.
- Dont use a regular top coat after stamping. Most top coats will bleed the stamped design. There are special quick drying polishes available to use over stamped nails. Konad has one, another is Seche Vite and Poshe. The trick is to not brush the same area more than once and do so lightly. Letting the nail polish brush go over the same area more than once can smudge your design if it is not yet completely dry.
Must-Do:
- Clean the image plate and stamper after every nail is stamped. Both surfaces must be dry before you start again. If you find cotton fibres sticking to your plate, scraper etc.. try using a cotton ear bud/Q tip/ or Lint free cotton pads. I find cotton gauze also works well. Just cut them in small pieces beforehand.
-Practice
-Practice

- You need to be quick..really quick. The last 4 steps need to be done in under 10-15 secs. Apply special/stamping polish, scrape, stamp plate and stamp on nails. Once you scrape an image..wipe off the scraper on the newspaper /disposable surface on which you are working. As in continue the scraping movement onto the paper and drag it down till most of the excess polish is wiped onto the paper. I find that this way I don’t have to clean the scraper much.
- Always have a bottle of nail polish remover and some Q tips ready

- Clean up after you stamp your nail. I take a brush dipped in acetone/ polish remover. Remove excess remover and lightly make small to-and-fro strokes while moving it around your nails and cuticles. Good stamping skills but no clean up looks gross. Take a thin short bristle brush or a flat brush zero number. You’d need one whose bristles are not very flouncy, but little flexible. Also helpful to stamp before you take a shower, If I have small bits of polish around, just use your thumb nail and scrape very gently around your cuticles while in a warm shower.
- Enjoy Your Nail Art :D
______________________________________________
I know this sounds like a lot..but believe me it is not. I have just tried to cover all points that I can think of. Stamping is not difficult, nor time consuming. It used to take me an hour to do 10 nails, now it takes me 10-15 mins max to do stamping on all nails.
All you got to do is practice. Watch a couple of videos on you tube and practice with a non expensive polish on paper.
FAQ:
What to buy/ where: Konad/Faux kits are easily available online. I would suggest one to buy a basic starter konad kit with one plate, one scraper, stamper and white polish. Once you get the hang of it, your options are plenty. You can indulge in Bundle Monster, MASH, Cheeky plates which are resonablly priced and come in a set of around 20 or more plates. Add more stamping colours and build your collection..after you successfully learn to stamp.
I think I have covered most points..but if you find some missing or have any questions, please let me know in comments below.
Happy Stamping!!!
I'm planning to start stamping and your post came at the right time, thanks :)
ReplyDelete:) I hope it helps
Deleteso you want us to pint something? I am game if u will pay:P
ReplyDeletePint? What pint? Wht did u drink today? :D
Deleteyou forgot your darling new red angel plates and I think you covered up pretty much everything.
ReplyDeleteYes..forgot..I m yet to stamp with them! thanks for reminding..*goes off to stamp wit RA plates*
DeleteIts so good for beginners :) Good job KJ :) :)
ReplyDeleteI am that beginner Namita.
Deleteand Kejal I want that polish you stamped Zebra stripes with. Okay!
Thank you.
:D
Thanks Nammo! I dont get to see u enough these days
Deleteu got it! Its those sandy-matt finish types..stamps really well
Delete:) :)
Deletewow post Kej... u worked so hard for this post...nd its surely very very helpful... i alwaz clean my image plate with acetone if i am stamping the image for d very first time..
ReplyDeleteThanks Dimpal!
DeleteGreat Tut K....:) Loving it :)
ReplyDeleteThanks Divya :)
DeleteVery helpful post...u have covered all points ....love it..:)
ReplyDeletethanks puja :) appreciate ur comments
Deletewoww...very useful tutorial
ReplyDeletelove this!! m gona stamp tnite!! :)
ReplyDeleteZee I wanna see plsss
DeleteVery nice and detailed tutorial. Thanks Kejal.
ReplyDeletethx Hema :)
DeleteKejal, I would love to be part of the FB group that you mentioned.
DeleteYou can send me the invite to rainbownailsblog@gmail.com
Thanks dear.
Very well explained tutorial Kejal... :)
ReplyDeleteGood work with the post Kej ..very helpful for beginners !! I take in my daughter for all the cleaning work after each nail :p She loves cleaning the polish with the acetone and sniffing the cotton ball, tho gets a smack each time she does it ;)
ReplyDeleteLOL! Poor thing..though Good Mom! :p
DeleteWow, how simple and detailed you described everything. The pictures are speaking for themselves...well done!
ReplyDeleteI hope it is helpful to beginners
DeleteYayyy.. Thankies babe
ReplyDeletegreat post, really detailed and picks up a lot of things newbies struggle with xxx
ReplyDeleteThanks Debbie!
DeleteSeriously, this tutorials is going to be on my 'fave tuts' list!! Thanks girl!
ReplyDeleteOoooh Kejal thanks a lot!!! It's probably most detailed and helpful tute in stamping ever! I've bookmarked it and I'll be sure to come back and refer it for my future attempts on stamping nail art. Big hug for taking time out and doing this for us :) luv
ReplyDeleteThanks Pooja!! I m only delighted to see u start doing Nail "Art" :D
DeleteThis is exactly what I have been looking for! (well thinking about looking for...I never quite got to the doing part lol) Thanks so much for explaining everything so clearly...must have taken you ages! :-)
ReplyDeleteGlad to be of help!
DeleteExcellent tutorial!!! Such a detailed and easy to understand. Kudoss Kejal
ReplyDeletethanks!
DeleteHey Kejal, I'm new to ur blog...love this tut. It's so detailed and well explained for beginners like me :)
ReplyDeletehope it helps!
DeleteThanks Kejal! This is awesome! I am going to keep this open in front of me the next time I am doing nail art ;)
ReplyDeleteI had tried a couple times with my bundle monster set & would get frustrated because of the little annoying things like the image not covering my nail or a certain polish not working but thanks to your tips I'm going to take a little time to practice. I really like the designs on the Cheeky plates so if I can get better at this then I'm going to treat myself.
ReplyDeleteThanks from Wichita, Kansas, USA
:) glad to help!
DeleteThis is probably the most helpful tutorial I've found on nail stamping. I've seen loads of others that just tell you to paint, scrape, stamp, ta da! But I've had real issues working out how to scrape it properly (kept scraping all the polish out!) and how best to pick up the image and other such issues. Part of it was using poor nail polishes, I've since found... Anyway, this was super helpful and very encouraging. Thank you. :)
ReplyDeleteAwww..Bonni! Ur comment made me soo happy! Glad to help..hope u can now start stamping!
DeleteWow!! What a great tutorial, I think it's the best one I've seen on stamping and I've seen many. I gave up on stamping about 6 months ago, got annoyed that I couldn't do it, so I put all the materials away and have just been doing nail art. Lately, I've been thinking about trying again, so this tutorial is so helpful. The thing is I bought the "As Seen on TV" kit when it came out last year (I don't know if you have them in India) and a few other bloggers got decent results out of them. So I'm wondering if one of my problems is the quality of the plates or stamper. Maybe I'll get the starter kit you suggested.
ReplyDeleteAnyway, reading this definitely has made me want to jump into stamping again and hopefully I'll get it right. Thanks so much!!!
Kelly
http://www.beautyobsessed2.blogspot.com
Awwww...ur comment made me feel soo good. M glad to help. Lemme know how it goes.
DeleteGreat Tutorial =) I love nail art and have been considering buying a stamping kit and think I just might after this. I hope its as easy as you made it look! Also where can i buy Seche Vite in India? I am in mumbai right now and all the top coats I have tried make my polish bleed! Thanks a tonne!!!
ReplyDeleteRooma
Seche is not available here. U can try ebay global easy buy section or ask someone coming from abroad to get for u.
ReplyDeleteAll our top coats in India will make polish bleed.
Acrylic paint is *non-toxic*. Therefore, it is MUCH safer to have on your hands than any sort of nail polish – even 3-, 4-, and 5-free.
ReplyDeleteThis comment has been removed by the author.
ReplyDeleteLove this tutorial. So easy to understand! Will try and let you know how it goes. Have some Cheeky plates that I want to try.
ReplyDeleteWaiting to hear how it went.
DeleteThis is fantastic tutorial ...really appreciating regarding cards...keep it up.!!!!!!!!
ReplyDeleteHi there, your post has been most helpful. I have linked it on my FB Page "Polished Tickles" as myself and my followers have been very curious on how to Stamp as I have failed many times before. I hope this is ok??
ReplyDeletehttp://www.facebook.com/PolishedTickles
I followed your instructions and your hints and I CAN STAMP! Thank you so much x I've had my stamping kit for a few months and failed totally to get any good results, almost gave up, didn't go near it for ages until today and apart from the mark I left on the dining room table (haven't owned up to that one yet!) the results were good enough to leave the house wearing!
ReplyDeleteThank you!
Yay!
DeleteGreat article!
ReplyDeleteI have got the knack of transferring, but I'm rubbish when it comes to aligning, I always think it looks right and then, once the stamp is off it's wonky, especially with tip designs, do you have any hints or tips apart from practice? x
I realised my stamping used to be slant when I thot i was stamping straight. So I changed my angle and stamped what I thot was slant and it wud come straight. get what i m saying? meaning when u align u think it is straight but when you roll and stamp your fingers r pushing in a different direction. So I adjust and put it a bit off than what I think is straight. practice this and u'll figure what angle puts it straight for u
DeleteThank you so much for all the great tips! I was trying to stamp my nails and was so frustrated because I couldn't pick up the full image. I tried your tips and now my nails are stamped beautifully! Thanks again.
ReplyDelete:) aaah! u made my day! happy to help
DeleteI totally failed at getting my new stamper set to work last night so was looking for a tutorial with lots of troubleshooting in it - this looks great. Thank you for renewing my faith in stamping!
ReplyDeletehope u get stamping soon!
DeleteHi...i am from India...this stuff is too expensive in India...can you please suggest some dealers or anyone who can help...
ReplyDeleteThis wonderful. I have been trying for a few weeks to stamp & these tips will help me very much. Thank you for all the hard work you put into the detail with the pictures and all the tips! Much love from Maryland USA
ReplyDeleteThis wonderful. I have been trying for a few weeks to stamp & these tips will help me very much. Thank you for all the hard work you put into the detail with the pictures and all the tips! Much love from Maryland USA
ReplyDeleteYou provided here very handy tips of adorning your nails. Melbourne Makeup Artist
ReplyDeleteGreat! A handy tips in making your own design on nail art. Very much appreciated. Now I've already had an idea on what to do with the design on nail art and what to use in applying it in my own nails.
ReplyDeleteThanks for the tutorial. I’m starting to learn how to stamp :)
ReplyDeletexo,
~Pauline @Kallony
Thanks, I just started stamping today and couldn't figure out why my image wasn't transferring to the stamper. After reading you tutorial I was able to stamp :) Being adventurous I tried it with polishes I already had (Essie & Sinful Colors), worked great. Then I tried a 2 color palm tree (Sparitual & a different Sinful Colors), again it worked great. I just have to practice my technique as I'm clipping very tiny pieces from the outer edge of the designs. If not for your tutorial I may still be just trying to get the image on the stamp.
ReplyDeleteDifferent organization promotes their business with different and unique strategies that become eye-catching and vibrant to others for instance they take help of nail printing technology...
ReplyDeleteare lakme, elle 18 and avon suitable for nail stamping?
ReplyDeleteHello! I'm Consu (consu.deviantart.com) I just watch a tuto and they give me a good tip. Instead pf acetone use a tape (transparent) and stick in the polished citicule, then pull... and the unwanted part of the design will be pasted in the tape. I tried and it works every single time.
ReplyDeleteAnd thanks for the rrrrrroollll tip! I would try it!
Nail Polish Designs With Pictures Any Ideas Easy Tips
ReplyDeletewow.. amazing and fantastic your Nail Art Designs
ReplyDeleteDịch vụ ship hàng nhanh từ việt nam sang lào chi phí rẻ
ReplyDeleteSHIP HÀNG CẤP TỐC Ở VIỆT NAM ĐI LÀO
Dich vu ship hang câp tôc ơ viêt nam sang lao chi phi re
This is a great post. I like this topic.This site has lots of advantage. It helps me in many ways.Thanks for posting this again.
ReplyDeleteHome Cleaning Services Mumbai
Bike Spa Services in Mumbai
Bike Cleaning Services at Doorstep in Mumbai
Hello! I'm Consu (consu.deviantart.com
ReplyDeletebaccarat
sbobet
สูตรบาคาร่า
thanks for sharing
ReplyDeletegolden-slot
จีคลับ
จีคลับ casino
gclub casino free games online for you!
ReplyDeletegclub
gclub casino online
Thank you so much for posting like this. I enjoyed much more here. So please keep update like this. And if you are looking for the best investor you may choose from our
ReplyDeleteMedical Insurance Plans
Health Insurance UAE
Insurance Companies in Dubai
This comment has been removed by a blog administrator.
ReplyDeleteThis looks absolutely gorgeous!! I love nail art but can only ever seem to be able to do one hand properly. Looking for Nail Art And Nail Extension Course to Study in abroad? Join Majestic Beauty Academy best nail school in japan which provides Nail Art Courses Australia for becoming a nail technician.
ReplyDeleteHi what are the stamping polish available in india thats cheaper too.You said you will add here.tnx
ReplyDeleteThis art is basically distinguished by the difficulty of the designs into basic, intermediate and advanced level according to the various websites that have appeared on the internet that need to be painted onto the nail. curso como fazer carimbo de unhas funciona
ReplyDeleteสูตรได้กำไรสองเท่า สูตรบอล พินิจพิจารณาบอลเต็ง เน้นย้ำๆแม่นๆ
ReplyDeleteรูแบบการพนันบอลจำพวกถัดมาเป็นบอลเต็งซึ่งก็ได้รับความนิยมไม่แพ้กันรวมทั้งสูตรที่นยมใช้กันเสมอๆเลยก็มีดังตั้งแต่นี้ต่อไป
สูตรพนันบอลที่ 1 ให้ท่านกระทำเลือกพนันบอลเพียงแค่วันละ 1 กลุ่ม แล้วก็ควรจะลงทุนด้วยยอดเงินพนันที่เสมอกันทุกๆวัน ได้แก่ วันที่ 1 เลือกพนันบอลเต็ง 1 คู่พนัน 1,000 บาท วันต่อๆมาคุณก็จำต้องพนันเพียงแค่ 1,000 บาทอย่างเดิม
ซึ่งสำหรับสูตรพนันบอลเต็งนี้ก่อนจะมีการวางเดิมพัน ผู้เล่นต้องเพียรพยายามศึกษาเล่าเรียนหาข้อมูลคู่บอลที่จะเล่นให้ดี แล้วก็ให้เลือกเล่นพนันเฉพาะกลุ่มที่ตนเองมั่นอกมั่นใจแล้วเท่านั้น อย่าเล่นเพียงแต่ต้องการเล่น หรือเล่นตามความรู้สึกถูกใจเพียงอย่างเดียวเพียงแค่นั้น
สูตรพนันบอลที่ 2 ให้ผู้เล่นทำเลือกกลุ่มที่จะเล่นมาวันละ 3 กลุ่ม แต่ละกลุ่มให้เล่นด้วยยอดเงินพนันเสมอกัน ตัวอย่างเช่น หากคุณจะเล่นพนัน 500 บาท ก็จำเป็นต้องวางเดิมพัน 500 บาทเสมอกันทุกครั้งม
สูตรพนันบอลที่ 3 ให้ผู้เล่นกระทำการเลือกกลุ่มที่จะเล่นมาวันละ 3 กลุ่มราวกับสูตรพนันบอลเต็ง สูตรพนันบอลที่ 2 แม้กระนั้นมีสิ่งหนึ่งที่แตกต่างเป็น ยอดเงินที่ใช้เพื่อสำหรับในการวางเดิมพัน โดยใน 3 กลุ่มที่เลือกมานั้น ต้องเลือกมา 1 กลุ่มที่ผู้เล่นเชื่อมั่นเยอะที่สุด โดยให้วางเดิมพันกลุ่มป้อมหัวใจ 1,000 บาท ส่วนอีก 2 กลุ่มที่เหลือ ให้วางเดิมพันกลุ่มละ 500 บาท เทคนิคบาคาร่า
ซึ่งสูตรพนันบอลเต็งสูตรนี้ นับว่าเป็นสูตรที่ใช้ได้ผลเยอะที่สุดและก็สามารถสร้างผลกำไรให้แก่ผู้เล่นเจริญที่สุดด้วยเหมือนกัน
I think it is very beautiful And wanted as a present for my girlfriend She must like it very much.
ReplyDeleteLike it.
That’s a lovely post! Well-written, heartwarming and so creative.
ReplyDeleteGreat post.Thanks for sharing such an informative blog.
Picknhook
Online Shopping for kids
Online Shopping for Women
All your post is so great my dear 👌💕
ReplyDeleteI do also some tattooing 👇
Cosmetic Tattooing | Cosmetic Tattoo | Permanent Makeup Melbourne: